Wednesday, February 27, 2013

Cheater Cowl Tutorial

Hi Stashbusters,
This is my loving February gift to you! My cheater version for drafting a cowl without really drafting... This post will have a lot of pictures and I apologize for not getting a photo of the final product on the recipient. It looks a lot like my bird top.
This was on my stashbusting list so completing this project brings me up to 5 of my 27 garments accomplished.

Cheater Cowl Neck Tutorial

Supplies:

  • Your favorite knit t-shirt pattern
  • very drapey knit, if it isn't fluid and drapey don't even think about using it for this.
  • a piece of wire or something bendy that will hold its shape
  • a nice pen with that fluid ink
  • everything else you need to make a t-shirt
Step 1: Lay out your shirt pattern like you normally would leaving extra space at top of front pattern piece.

Step 2: Cut a piece of wire the exact length of your front armhole. (mine is bent from use)


Step 3: Cut out bottom and side of pattern like usual and remove pattern piece without disturbing fabric.


 Bend your wire into a U shape. The deeper the bend the deeper the cowl will dip.
 

Step 4: Lay the curved wire at the cut edge and trace your new armhole shape. Neaten edges if needed.

Step 5: Align front pattern piece with the edge of the armhole and draw shoulder line, marking the neckline. Continue that line doubling that length plus a 1/4 to 1/2 inch seam allowance.

Aligning the shoulder seam
Marking notch and doubling the length.
Final shoulder line.
Step 6: Draw a straight line from shoulder seam to folded edge.


Front shoulder and neckline drawn.

T-shirt front cut out.
 Step 7: Finish back neckline however you prefer. I chose to do a self fabric binding.


Step 8: Finish raw edge of neck and fold at shoulder mark.


 Step 9: Match up shoulder seams of front and back. Sew as usual.

Front to back sewn together.

Close up of shoulder seam at neckline. 
Step 10: Finish shirt as directed. Wear.

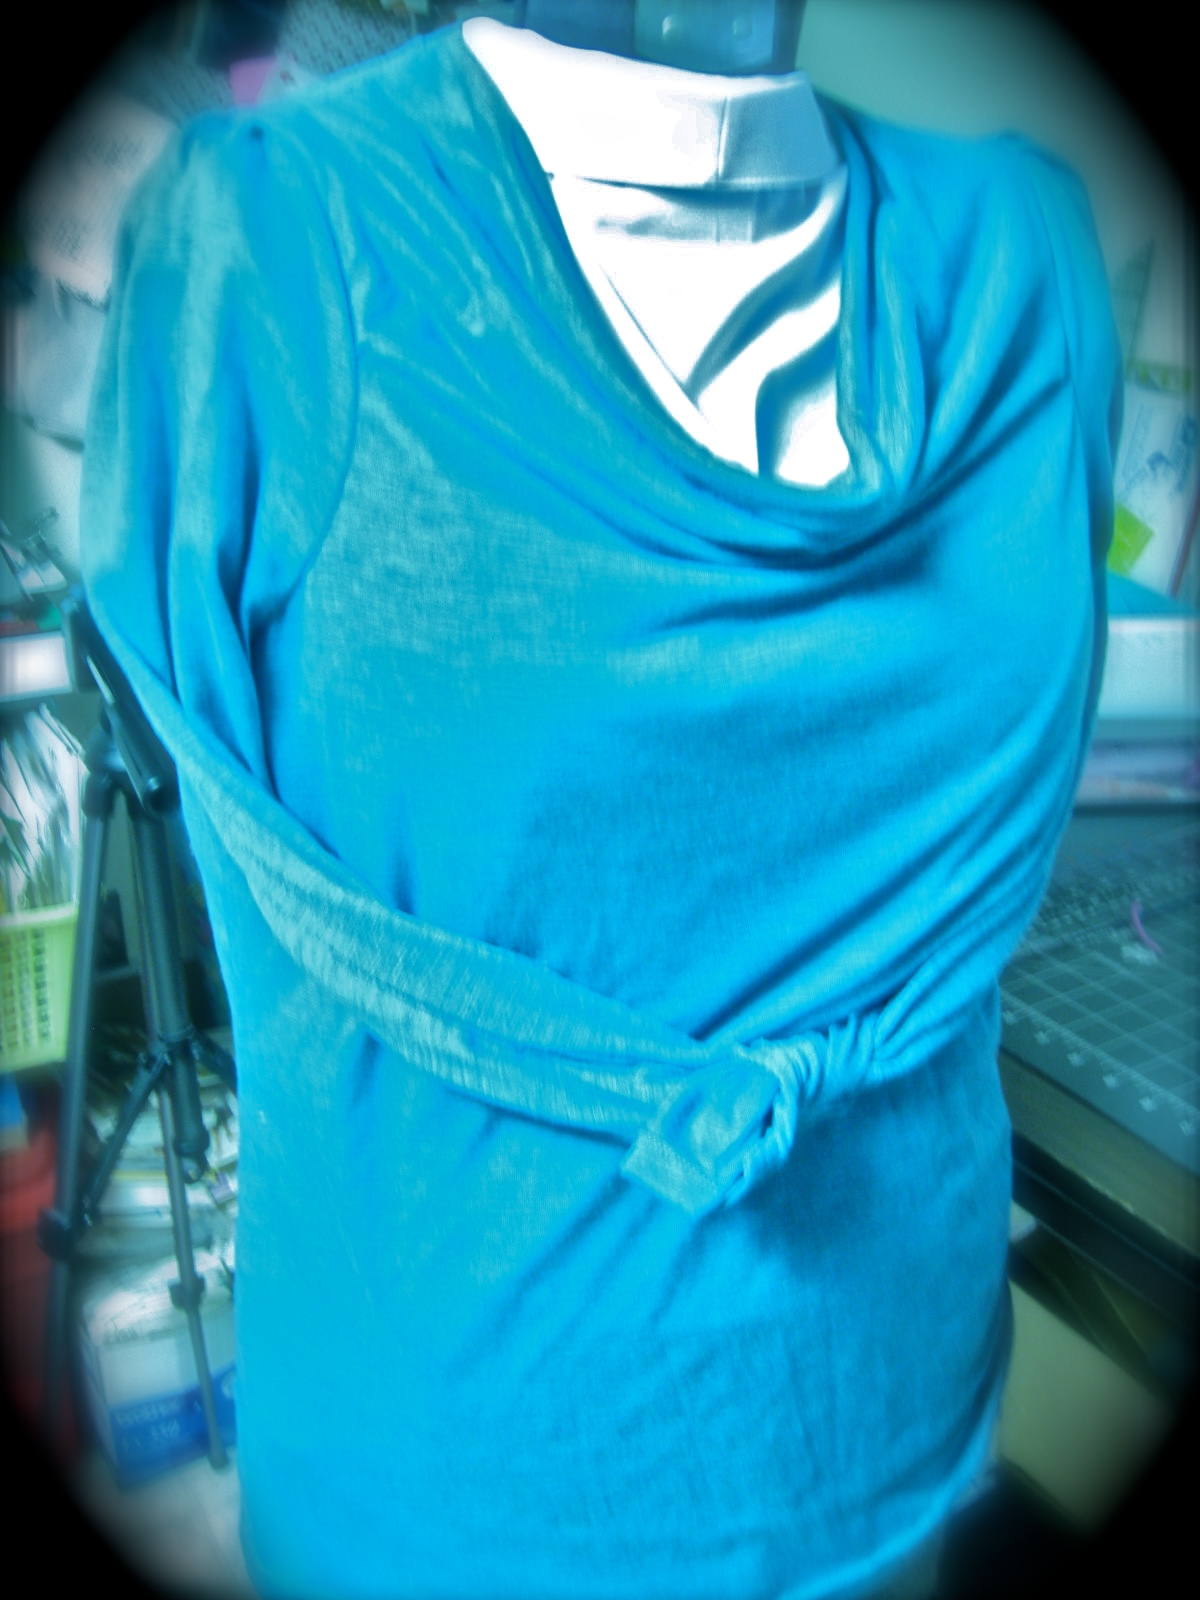
Photoshopped pic of the final result.
So there you go, easy peasy! If you make it up, have any questions on this process, or have any tips on bettering my tutorial skills; please leave me a comment and I will do my best to answer! 
Thanks for taking the time to catch this weed, I'll be tumbling along now...
EMily

Monday, February 25, 2013

Kawaii Stashbusting

Hello Again Stashbusters!
  How's the last week of this lovely dovey month going to go? Probably as quickly as the rest of the month has! That hasn't stopped you from making some AMAZING things! If you participated in our Challenge this month, Sewing something for a loved one, head on over to Cation's post and leave a link so we all can see your creativity! You have until March 2nd to enter, voting will be open to ALL stashbusters, whether you entered or not, from March 3rd through the 6th. Cation and I will pick a winner from the top five!

So how's my stashbusting for others going? I thought you'd never ask! Well last week held a few surprises that changed up my plans. My best friend from college was in an accident and broke her ankle in two places and my Aunt is turning 60. While both of them sound like they will survive, they both sounded in need of some care packages full of sewn goodies.

I loved getting to use some of my new decorative stitches and how they
added perfectly to the sad vibe.
Over Skype, my Aunt shared she had decided to have a "Pathetic Pizza Pity Party" 
full of black, red and white decorations. Kawaii had been popping up on my radar lately and a quick google image search gave me plenty of sad kawaii inspiration to make her this tiny potholder.
 I feel he is appropriately mourning with her without being too depressing about it. I told her I was glad she didn't take the alternate route for growing old. Me only being in my mid twenties doesn't really see why 60 is such a sad deal. Shouldn't she be happy she's made it that far?
Perfect for pulling out pizza!
Anyways, we do love each other and no disrespect is intended in this post. She seems to be having a lot of fun planning a party. I hope this will add some laughs to it as well. Do you think she'll like it?
All I want to do is make a giant quilt full of kawaii faces now... Is kawaii the Japanese word for cute? Does the word mean a specific style or just any old cute thing? 
Hmmmmmm....

Keep up the good work stashbusters! I'll be back later this week with a tutorial just for you expressing all my love!

Friday, February 22, 2013

MmmMmm! Warm and Beautiful!

I'm so excited I finally get to share these with you all!! I must admit I'm more excited to be wearing them though. I wasn't sure about the leg width but after my little photo shoot, I think they are perfect!
My beautiful warm corduroy pants!
This is the second pair of pants I've made with Simplicity 2562. I really like the fit I have achieved in the waist and feel like the booty's not too bad either. I didn't want to mess with a fly front in these so I just added a side zipper.
My old, worn store bought cords. Not bad for five years of wear.

Old worn and boring on the right, Lovely, fun details on the left.
I'm delighted I got to use that amazing old button.

From Frayed to Fabulous. Hemmed to the perfect length so it won't
happen again.
I had so much fun putting the details together on this and am so glad to have a nice looking pair of warm pants in my drawer again. But now I have some questions for you!

These are a wide leg pant and I've learned the heaver the fabric the wider the leg. I want to do a bootcut jean next and am not sure how to draw it in. I experimented by basting these pants and it twisted the leg around.

Do I just mark my knee and taper above and below? (I made a muslin out of the leftovers of my brown poly pants but it didn't work cause you can't press poly:P) Should I just make another muslin out of a better fabric?

Please share your jean making resources! All I can find are directions for making skinny jeans which is not the look I am going for. I did find this site with a promising resource. Has anyone heard of her before?

I am in need of your pant/trouser making wisdom. I know there has to be a solution out there! Thank you!

Oh yeah! I almost forgot, this is garment makes 5 down of my 27 stashbusting garment total! Pretty sure this is vintage corduroy I got from a lady before I went to college...

Wednesday, February 20, 2013

Sewing Smiles

Once again life whirls by and drops something unexpected into our laps. As the wind whistles around my house tonight, my best laid blogging plans have once again gone awry and I cannot seem to snatch back my thoughts to make it a reality.

So I thought I'd share a bit of sewing humor instead. I love words and here's a few of my favorite sewing quotes which were found here. Which one do you like the best?


For the Knitters:
                               I like making a piece of string into something I can wear.  
~Elizabeth Zimmerman

It took me years and years of trial efforts to work out that there is absolutely no knitting triumph I can achieve that my husband will think is worth being woken up for.  ~Stephanie Pearl-McPhee, At Knit's End:  Meditations for Women Who Knit Too Much

For the Seamsters:
Asking a seamstress to mend is like asking Michelangelo to paint your garage.  
~Author Unknown

Those who sleep under a quilt, sleep under a blanket of love.  
~Author Unknown
For the Stashbusters:
Sewing fills my days, not to mention the living room, bedroom, and closets.  ~Author Unknown

I'm a material girl - want to see my fabric collection?  
~Author Unknown
For us all!
The only place where housework comes before needlework is in the dictionary.  
~Mary Kurtz

Any day spent sewing, is a good day.  
~Author Unknown

I hope you got to put a few stitches in something today!

Tuesday, February 19, 2013

Making up and Mapping

        
What? What does a map have to do with sewing? Only everything amazing!  Viki, (at least I think that's her name, I just found her blog.) of Another Sewing Scientist has started to map all us sewing bloggers! You can get all the details here! Now we can meet each other in person and haunt our favorite fabric stores. All I want to do is travel the world and buy fabric!
Go add yourself right now! 

I felt bad I didn't get anything posted yesterday but I didn't have anything worth posting ready and I am trying for quality over quantity. This was too cool not to share though.

Friday, February 15, 2013

Stripy Love

Hi Stashbusters!
 First I want to say a big HELLO! to all the new participants! I've had several more ladies take the pledge and join the sewalong. I'd list you all but I'm afraid I'd leave some one out and then we'd both feel sad. Links to everything that is going on can be found on my main StashBusting Sewalong page. Be sure to join our Flickr group and get inspired by each other! You all have kept me sewing and I've gotten another project crossed off my list!

February Stash Goals: 7 garments planned, 4 accomplished, 3 left.
Stashbusting Year Goal: 27 garments planned, 4 accomplished, 23 left.
Nothing like a pretty puffed sleeve.

Details, details, my topstitching didn't turn out too bad on
this one. 

One happy Mom whose face I cropped out on request.

I LOVE this knit and can't wait to make myself something scrumptious in it! It's so bright and cheerful and surprisingly presses very well. So Zoe just blogged about Breton Tops and how much she loves stripes. This might seem like a stupid question but I genuinely don't know. Are all Breton Tops striped? Is any striped top classified as Breton top?

Thanks, and have a great lovely dovey weekend.

Wednesday, February 13, 2013

February Love Sewing

NATOSHA, DO NOT READ THIS UNTIL YOU HAVE GOTTEN THE SHIRTS!

Hi Stashbusters,
Sorry about the large notice but I don't want to bias my recipient until she has had a chance to wear the stuff herself.
This is definitely cake sewing and it wasn't for me so the photos don't look too terrific. We all need some good basics and no one needs them more than a young mother of five. My good friend Natosha, picked up this fabric at Wally world for a $1. a yard and told me to make stuff.

I loved the color of the red and started in with some basic long sleeve shirts. One was supposed to be for me and one for her. To keep the sewing interesting I made one raglan sleeve and one a set in sleeve.  I should have paid attention but the lure of the sewing kept me from properly evaluating my fabric. This knit has almost NO stretch. So they are a tad too small for me. I guess she'll just get two shirts to wear around the house. Anything else I make with this fabric will be treated as a woven and maybe I'll get results I am more satisfied with.

On to better and brighter things, the white knit she purchased did stretch well and has a lovely cream stripe going on! I love tone on tone prints!! She didn't want a white top for five small reasons but she did like the white and blue fabric together. When we decided to make her a cowl neck top, I knew what to do with the white!
Isn't it pretty fabric. It's actually two thin layers attached with tons of tiny threads.
So soft and squishy! Anyone know what it's called?

I curved the ends because I could. I wanted it to be a dual purpose tank top and double as a nightshirt if needed. While we are both tall, seeing it on the dress form makes me wonder if I cut it excessively long....

Now for a few numbers:
February Stash Goals: 7 garments planned, 3 accomplished, 4 left.

Stashbusting Year Goal: 27 garments planned, 3 accomplished, 24 left.

How's your February Stashbusting going? Have you ever ignored the warnings fabric gave and had it tell in the garment results?
It's raining tiny snowballs here. All three animals were in the box together
but got shy when we caught them snuggling out our window.