Friday, November 29, 2013

Black Friday thru Cyber Monday Sale

Hey Guys! If you're like me you're hiding from the crazy local shoppers and getting your Black Friday Deals online. I'd like to give you one more great place to shop.

You can see all the new listings and all the shops having sales in this thread right here!

My shop, EmSewCrazy, is on the list with 20% off all patterns and fabric through Cyber Monday with coupon code HOLIDAYSEWING2013.
I'll be listing lots of goodies throughout the day so be sure to stop by and take a peek!


Monday, November 25, 2013

I've Been Busy...


More details coming soon cause I miss you guys! Is it too early to break my fabric buying ban? Will my Grandmother let me? Are there any special fabric shops in West Virginia that are worth breaking my fabric fast?

Wednesday, November 20, 2013

Janey Jump Up Dress Kawasaki Style

 Somebody had a birthday!

Not only is November my birthday month but it is also Giggle’s birthday. She was supposed to come on my birthday but came early instead…

  Giggles can be such a serious little person in public and when she is on a mission. When she sews with me she’s very focused. We love looking at different outfits on Pinterest and while she thinks I should make them all she liberally dispenses some of the skirts and dresses to her sisters, usually by color. Her color is GREEN. Preferably bright green. But she’s not terribly particular; as long as it’s mostly green she’ll wear any other color with it. 

Mom and I went through the stash and found this lovely bright green I had buried since it’s not my cup of tea. So yea for more Stashbusting! I decided to try the Janey Jump Up pattern I received from Peekaboo Pattern Shop for signing up for their newsletter. 

I used this AMAZING method for putting the PDF pattern together, and used plastic drop cloth to trace the size I needed. 
Plastic drop cloth works well except for the edges being a bit hard to see when cutting if you don’t have good light. I use weights and a rotary cutter. I wouldn’t recommend drop cloth if you use pins and scissors.


Pattern Alterations: I wanted this to be a long dress on her so I add 5 inches to the bottom of the dress. You can see for a long dress I needed every bit of the length.

This was a pretty easy pattern to follow. I read through the directions in the beginning then sewed it together in one evening.  On the hanger I was afraid it would look a bit like a nightgown but not so much once it is on.

The pattern suggested using ribbing and the only ribbing that went well with the dress was some purple I had. I thought it would be a fun accent color that I played up in the buttons and decorative stitching. It wasn’t until I was telling her mother about it that I realized I made a dress that matches daddy’s favorite color scheme: Kawasaki green and purple… Happy Birthday Giggles.

Monday, November 18, 2013

Espresso Waistband Exposed

Steph asked if I could capture the instructions to the waistband in photos so I did my best as I finished up my three new pairs of leggings!

The instructions pick up right where we left off in my last post, Marking the Centers.

“Fold ring in half at CB and mark center front(CF) at the opposite fold."


"Position elastic on wrong side of waist edge, about 1/4” (6mm) from the edge. Align elastic CB with leggings back crotch seam and elastic CF with front crotch seam. Pin in place. At the CB and and CF crotch seams, stitch in the ditch through the elastic to secure."

You can see I serged my edges so I had a 1/4 inch marked all around my edge. This made it very easy to align the elastic throughout these steps.

I tried pinning first but found it easiest to just stretch as the directions said.
"6. Fold over the fabric and elastic to the inside and stitch, approximately 1” (25mm) from folded edge. For best results, try to catch the fabric without sewing over the elastic. … 
Stretch the waistband gently while stitching so the elastic lies flat.” 

Make sure to keep the elastic from twisting as you fold it over. Make a nice tight crisp fold and use your "fingertip knowledge" to keep the edge of the elastic lined up next to the edge of the serging.


My rib knit was slightly puffy when I tried to fold it over so it took some extra coaxing to get it to lay nice and tight and flat. 
Can you see the puff? Did I capture the poof?

I used a small zigzag stitch to finish the waistband and so far it is holding up nicely. I gave them a trial run this weekend and they kept me toasty warm! Hope your legging sewing goes well!!

Wednesday, November 13, 2013

Expresso Elastic Hack

Beware sewing interwebs, Cake Patterns is hosting another sew along for it's latest pattern release and I'm part of it! Go Esme House!

Red Velvet Sewalong Esme House
Since Steph released a whole mini collection and not just a dress this time we get points for all the leggings and clutches we sew up as well. I cut out three pair on my first day and am now ready to insert the elastic waistband. I use a slightly different method, I don't even know if this should even technically be a hack...


1. Cut the elastic to your exact measurement. Instead of overlapping and sewing down the elastic, butt the two pieces of elastic against each other and stitch to a piece of woven fabric.
2. Stitch a lot! I prefer and used a zig zag stitch on my leggings.
2a. Trim fabric to stitching lines so it is invisible from the front.
3. Mark center back off to one side of join.
Center front and center back read to be pinned to my leggings.

Continue on following the expresso directions. This gives you a waist band with no lump at all! What do you think?

Tuesday, November 12, 2013

November Stashbusting Theme and October Roundup

Wow Guys! Can you believe that we're almost finished with our year of stashbusting! Only two months left... I can't wait to see what we get done now that we're entering the crunch time zone... Anyone else looking at their mountains of fabric and thinking, "What are you still doing here?" :)

Ok, let's get sewing! November's theme is The Charity Challenge. Cindy's got all the details in her post and people have already started chiming in on the great charities they know of. Please continue to leave comments here or there of great charities you know. I'm checking in and pinning them to November's board so we can have all the inspiration in one place.


I don't know about you, but October really flew by for me. There were still some fabulous things made...
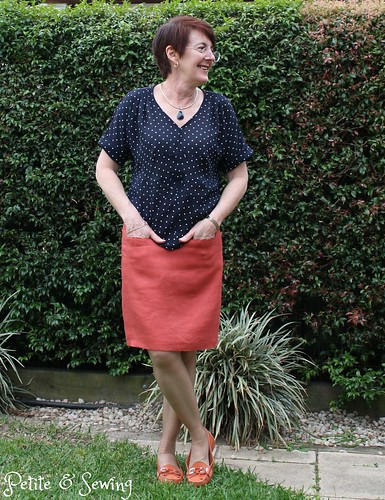
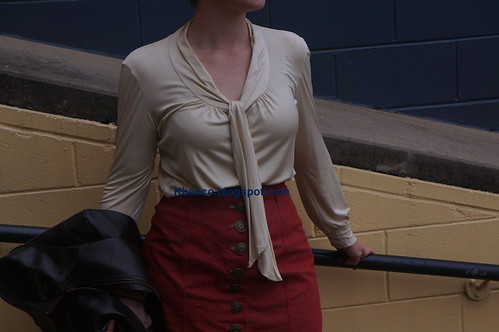
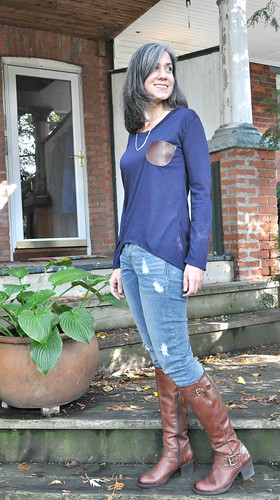
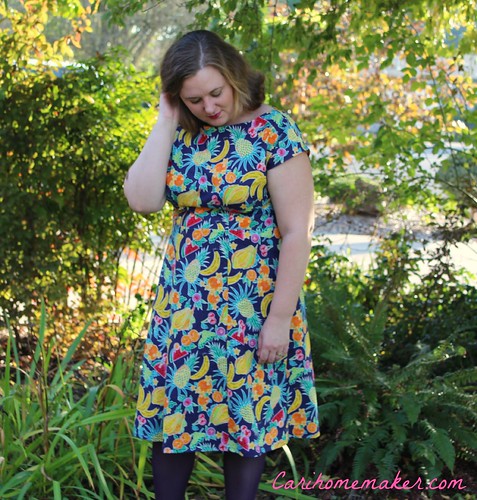
Amazing Tops!
Renfrew Top
Such a good use of print.
Simple Sweater
So comfy!

Vogue 1247 Rachel Comey Top
Polka Dots!

Burda World of Fashion 09-2007-101 blouse
My favorite out of three lovelies.
Briar T-shirt
Cool casual!

Some Fabulous Jackets

Emma's Winter SWAP
Red Cheetah!!

Burda 135 Front View
Be Tough!
Actually both these ladies made two fabulous jackets this month but you'll have to check out their blogs to see it!

I'm so thankful for everyone who is participating in this and my family is thankful something is keeping me from dragging more fabric home! Keep up the good work! I'll see ya around the sewing machine. ;)

Friday, November 8, 2013

Testing Testing, Read All About It! Expresso Customized Leggings Take The Cake!

Whoo Hoo! The Christmas Elves are happy tonight! They're sorting through the stash to find lots of legging fabrics to keep them warm as the work!


Fabric: 4 way stretch swimwear fabric that I'm pretty sure is almost 100% spandex bought many years ago when I first started sewing with knits. I didn’t know much about them and this was in the dollar bin. It’s the piece of fabric that just keeps on giving. It has so much stretch and recovery I didn’t even have to put elastic in the waist band. They also stretched out super long so I can use them as footies if I want.  This fabric has always been cool to the touch and when I wrap my legs in it I’m actually colder wearing them than I am bare legged. Which defeats my primary purpose in wearing leggings: to keep me WARM.

Pattern Details: Using Cake's measuring tutorial and template I was able to easily draft my specific size leggings even even when my measurements fell in between some of the numbers. I'm 5' 10" and was interested in seeing how these would do in length. It was very easy for me to add an inch at the bottom to make sure these cover ALL of my legs.
Using the stripe/stretch line meant these stripes practically matched themselves, much to my delight.
There's not much more I can say about them. If you're like me, quit dreading and putting off the measuring. Draft those buggers and get to sewing! I see a new addiction coming on!


As you can see, I feel like a happy elf in them. These will be put in costume rotation because they make me too happy to get rid of. Anyone know of any elf parties happening?

Wednesday, November 6, 2013

Stashbusting Infinity Style

I really wanted to get this up in October because I think it is a fabulous gift idea plus a fabulous stashbusting project.  But life got in the way so you get it now. 
I got this pattern from Thread’s Issue 158. The December 2011/January 2012 It’s "The Koos Loop A designer's spin on the infinity scarf". Thank you math people who figured out how this works. All you sew is straight lines and you end up with a beautiful bias looking scarf with no bias strips. 


Some of my personal notes:
  • Sometimes, instead of sewing different strips of fabric to one large base fabric I sew strips of fabric together. 
  • I mark chalk lines and use fusible tape to make sure I get straight lines and to hold multiple layers of embellishment together.
  • Taking a friend’s advice I tried (mostly) to keep all the colors complimentary so it would be easier to match with garments for those who like matching outfits. 
  • Depending on the fabric you can have a rather larger stand out(as in away from the body) statement piece or a closer lying drapey scarf.
  • These are slightly addicting when you start matching fabrics, ribbons and lace... all the "infinite" possibilities.

I love the hidden pocket in this one! 

One of these is an actual Christmas gift while the rest are more mercenary sewing for the craft show. What do you think? Do you wear scarves as statement pieces? Most of my clothing is already made from crazy prints so I have to look hard to find pieces I can wear these with.
Ps. Check out the portrait of me that my seven yr. old neighbor boy drew of me during Bible study tonight. It made my day!

Monday, November 4, 2013

Button Stashbusting?

I'm not sure if this counts as a stashbust but it is a moderately easy and pretty quick project to put together.

Button Earrings!! I got my ears pierced solely so I could wear dangly earrings. Even though the stud button earrings are cute; (I even have two pair) I needed to make a seamstress's favorite notion a dangly masterpiece.

I used wire and spacer beads for most of them so I could easily use different size buttons. This results in a straight drop earring.
If the buttons are small enough you can use jump rings. I used the larger ones through the bigger holes and the small rings to connect them. This results in a loose jinglier earring.
You can see the flexibility in the
jump ring pair.
 I think they are cheerful happy little things. I'm taking them to the craft show with me and I almost hope they don't sell... Would you buy button earrings? Have an itch now to make your own???